2024-06-25
Creating A Virtual Machine With Windows in AWS
In this new post we’re going to create a Windows Machine in AWS. Given the fact that Windows deal with almost everything using the User Interface (UI) the best, easy and fast way to have a Virtual Machine running Windows is using
The intent of these next posts is to create different AWS Virtual Machines, each one running the 2 main operating systems: Linux and Windows. We are not going to create a MacOS VM because it doesn't have a Free tier in AWS. Check the lost post to see how to create it in Linux
Cost of creating different Virtual Machines in AWS
The major concern when you’re going to install anything in AWS is the associated cost. What we’re going to do is to choose the “Free Tiers” under each OS. You’ll be allowed to use this Free Tiers for 1 year. If you don’t want to wait that time, you can shut down in any moment the VMs and avoid any payment
Things to do
- - Have an account in AWS: If you have this email: [email protected] is a good idea to sign up in AWS with the next email [email protected] that kind of email (with a + sign) works like an alias of your main domain. Refer to this article about it: https://www.fastmail.help/hc/en-us/articles/360060591053-Plus-addressing-and-subdomain-addressing
- - Have a Credit Card to set up your account. Don’t worry, because if you don’t use any other resource you won’t be charged by AWS
- - Shut down everything again once you think you won’t be using this VMs anymore
1- Creating a Windows Virtual Machine in AWS
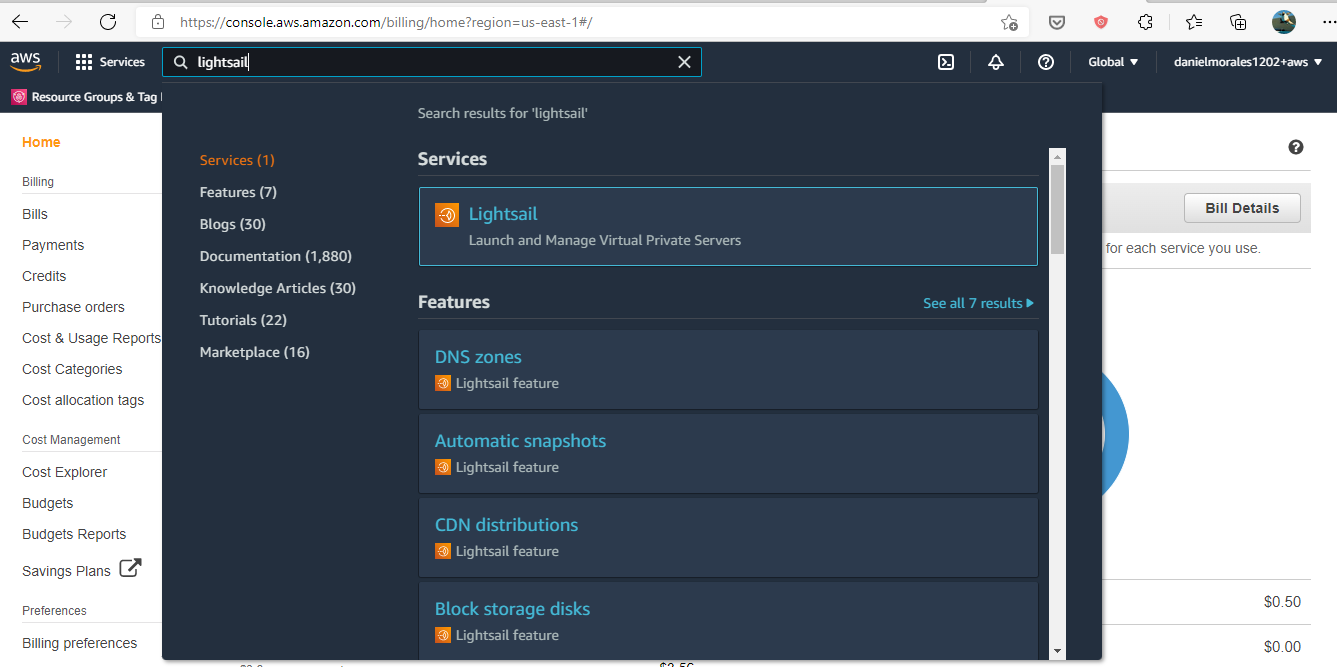
Once you have an account in AWS and you attached your credit card (I guess you don’t need help here, because is really easy to do this 2 steps) we’re ready to start installing our VM, for that we’ll be using Amazon Lightsail, a service that help us to do this very easy. Let’s go to our account and search for Lightsail
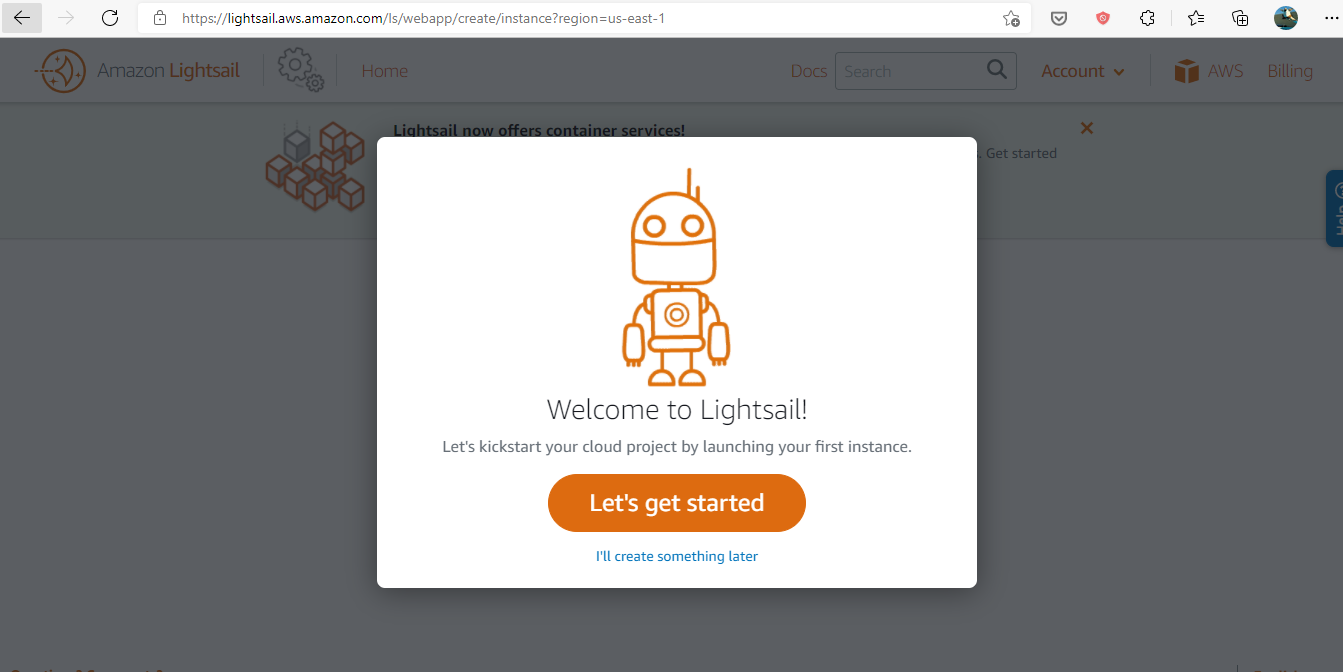
You'll be redirected here
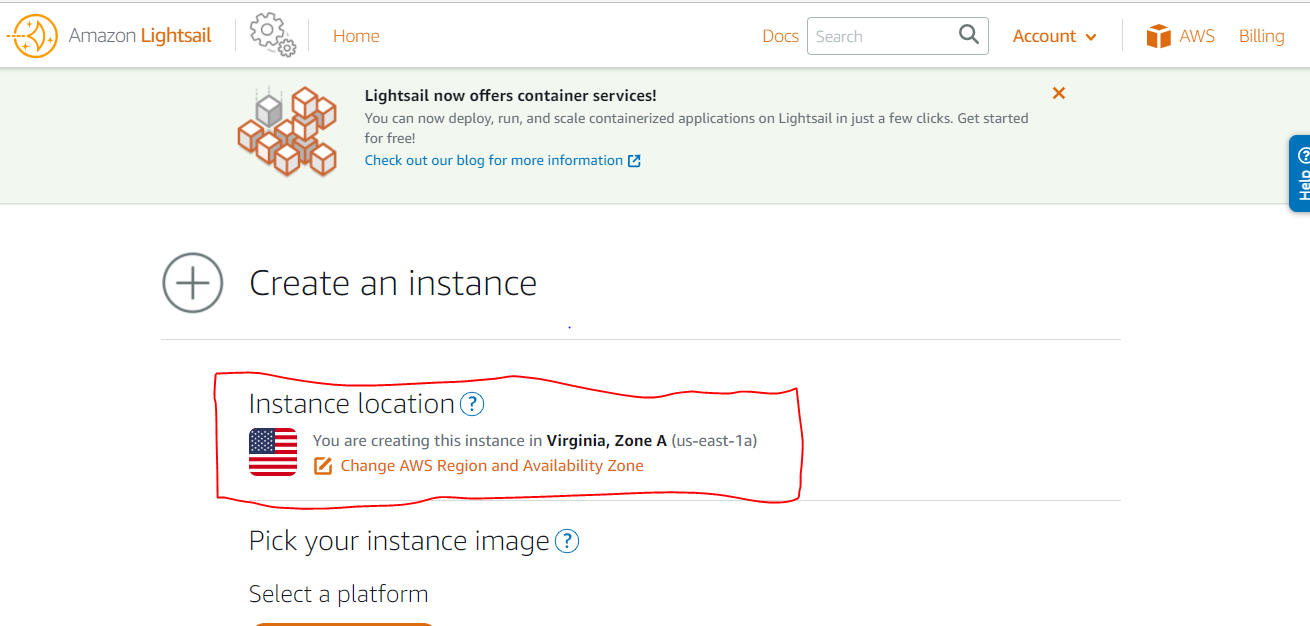
So let’s get started. We choose the location of the instance as Virginia
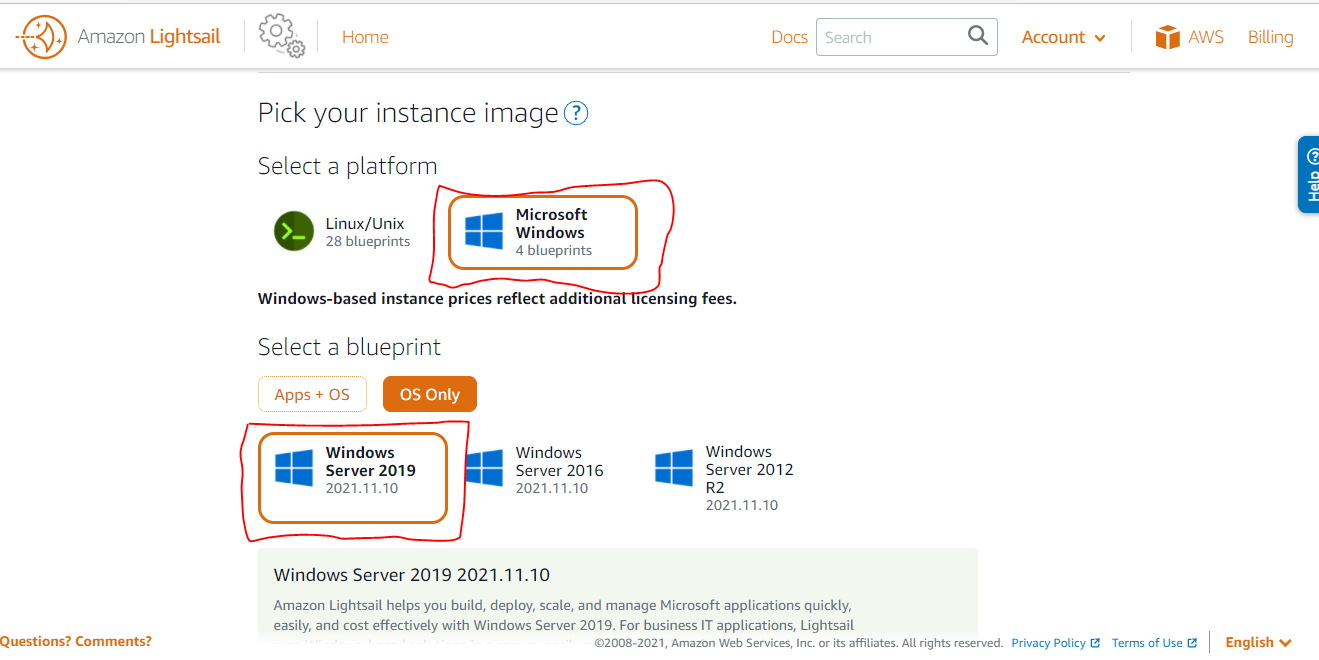
Now we select the Windows instance and then the Windows Server 2019
Then we select tha plan.. You can see that first 3 months are free.. This is enough to our testings

I choose $12USD plan because it has a biut more resources, so we don’t get stuck if we need to instyall something bigger inside our instance
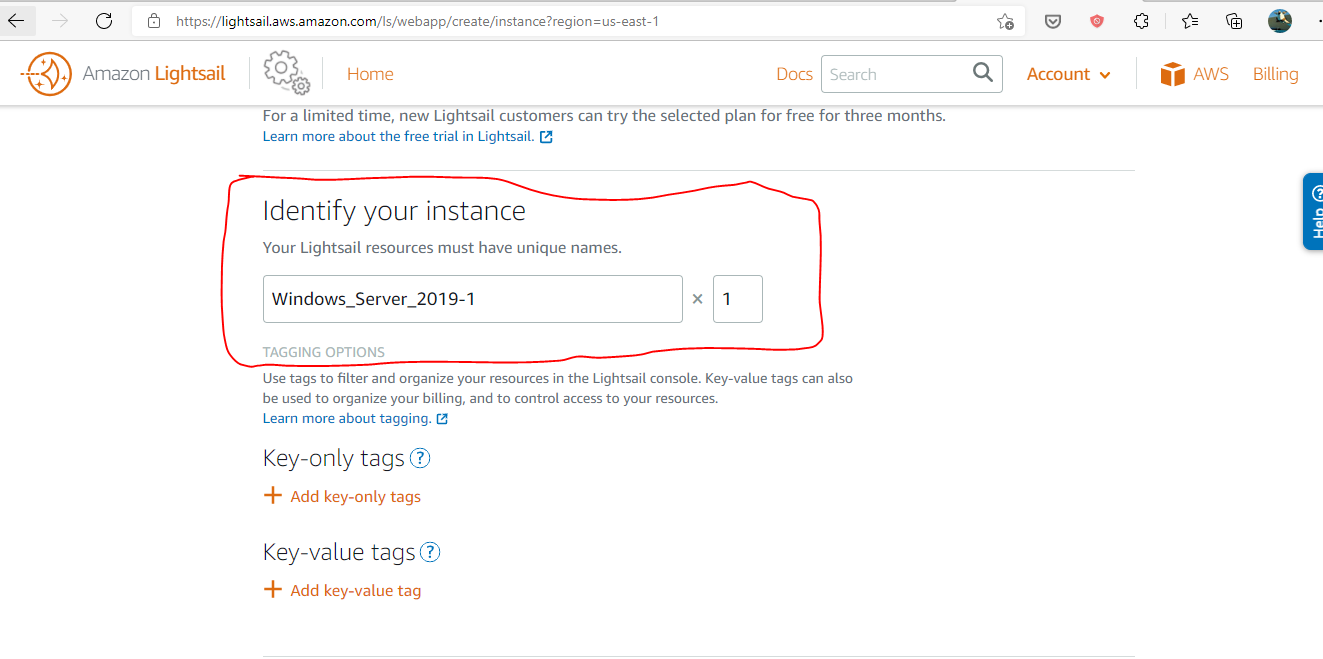
Now we can create a name to our instance, or keep the current name
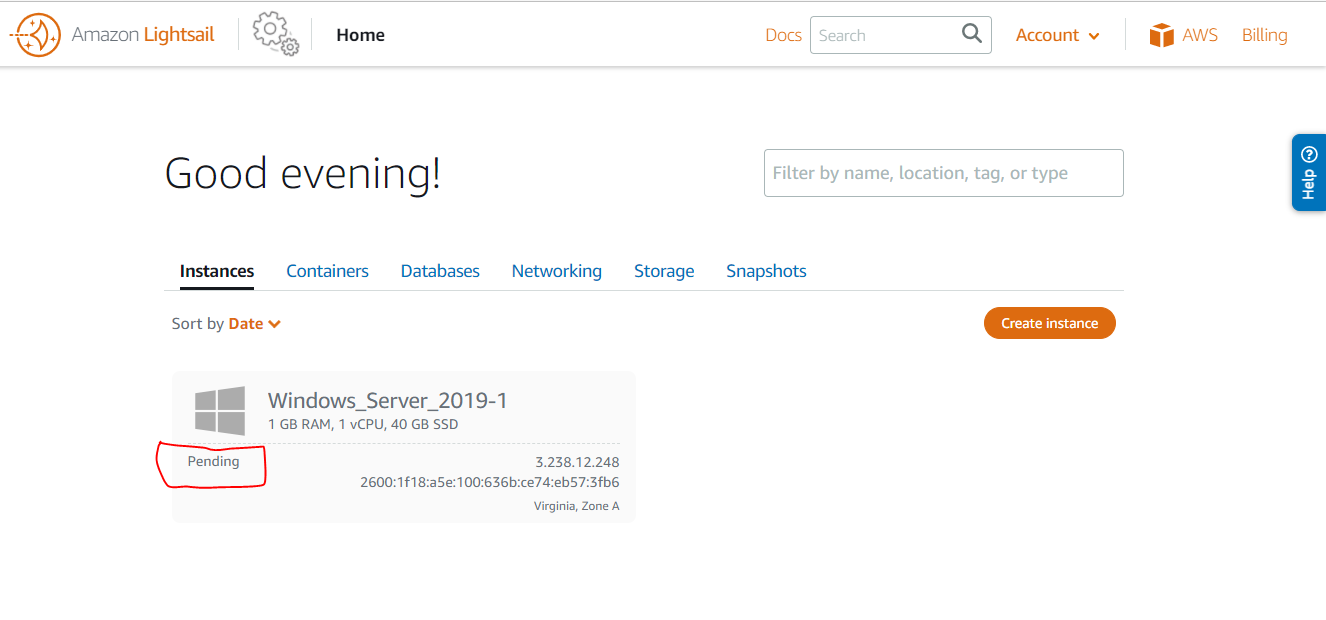
Then click on “Create Instance” and we’ll see the instance Pending
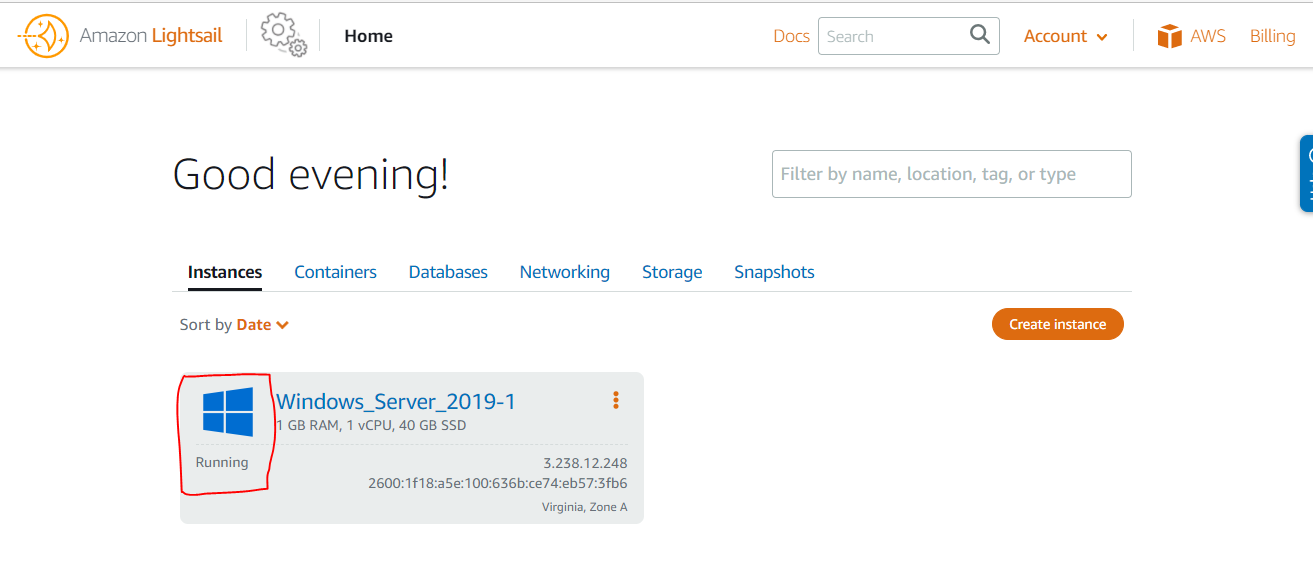
After a while we can see the instance running
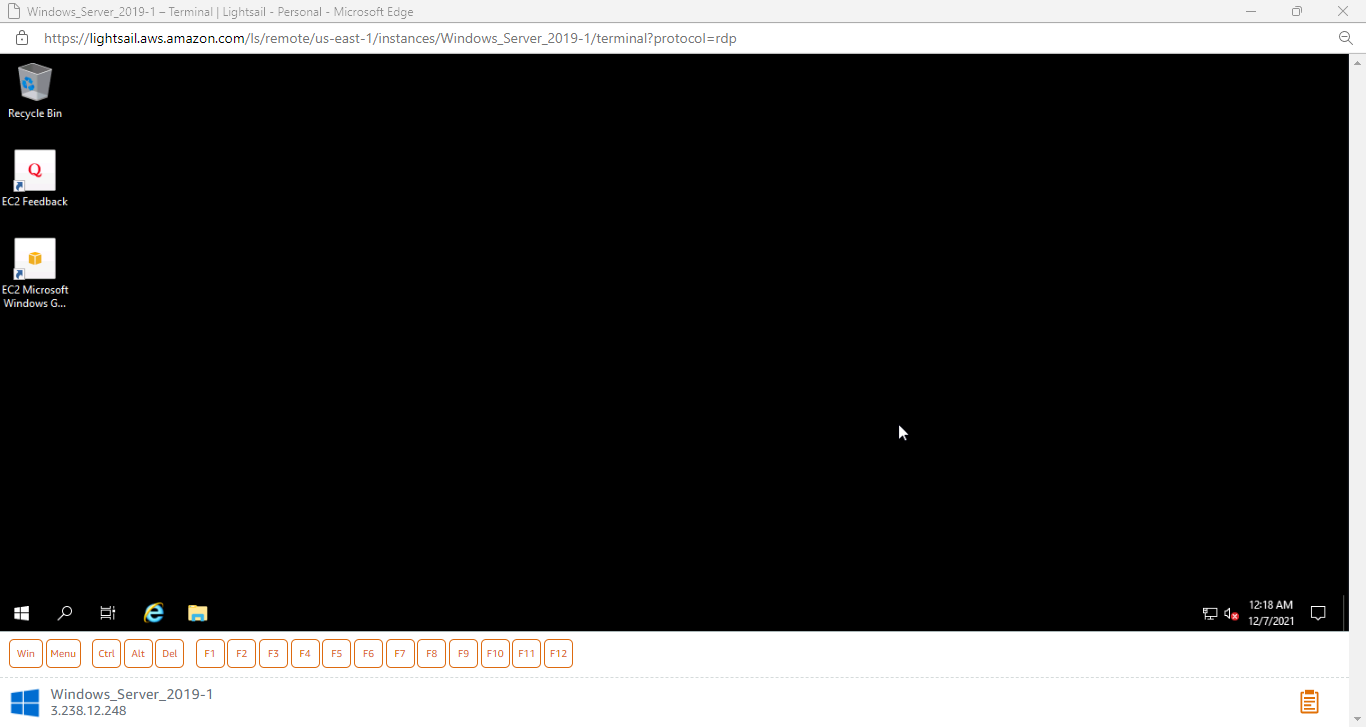
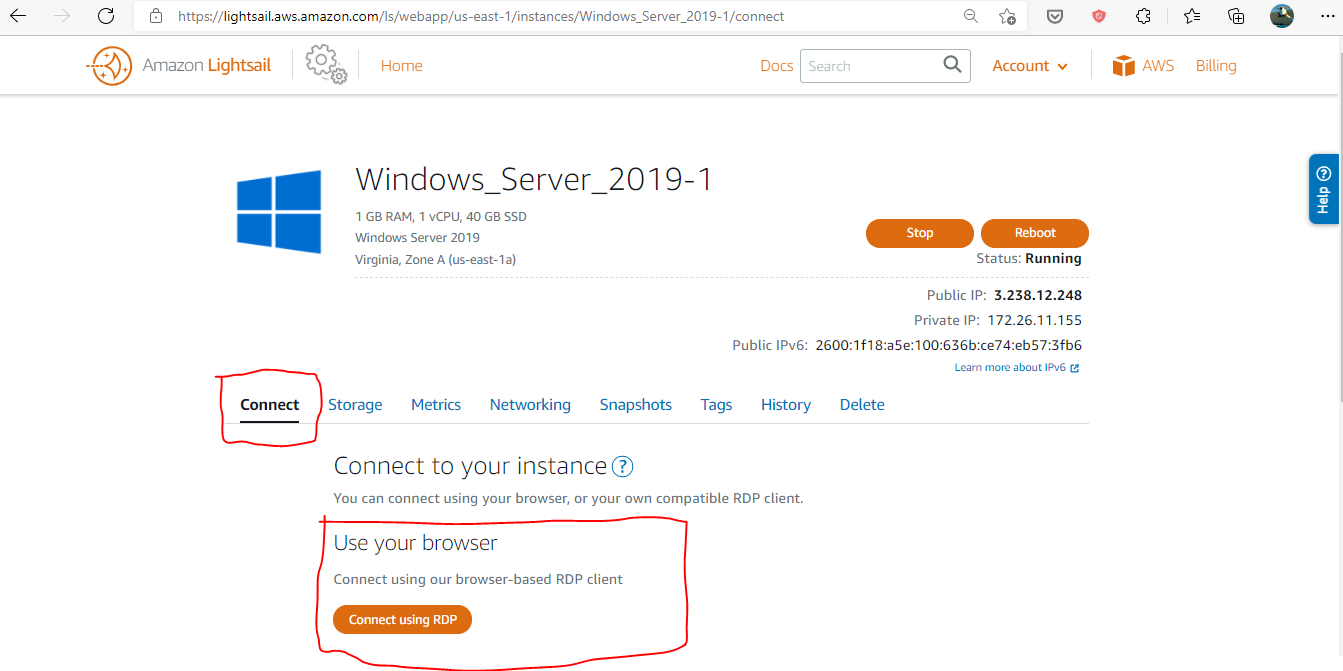
After a couple of minutes we can see the button called “Connect Using RDP”. This is the way we can access to the instance, so let’s click that button to see what happens
That’s it, we can now see a Windows machine! This setup is easy, useful and we’re ready to install whatever we want in Windows