2024-06-18
Creating A Virtual Machine With Linux in AWS
In this post what we are going to do is to learn to work in the cloud. I mean, it’s ok that you work in your local environment, but to explain the installation of package managers, dependency managers, libraries and tools I need to have your same environment.
Normally, instructors have their own local environment and they explain everything according to that environment. If you are working on Windows, you won’t get the whole setup correctly, or you have to go out there to search how to install something and have almost the same setup as the instructor.
The intent of these next posts is to create different AWS Virtual Machines, each one running the 2 main operating systems: Linux and Windows. We are not going to create a MacOS VM because it doesn't have a Free tier in AWS
Cost of creating different Virtual Machines in AWS
The major concern when you’re going to install anything in AWS is the associated cost. What we’re going to do is to choose the “Free Tiers” under each OS. You’ll be allowed to use this Free Tiers for 1 year. If you don’t want to wait that time, you can shut down in any moment the VMs and avoid any payment
Things to do
- - Have an account in AWS: If you have this email: [email protected] is a good idea to sign up in AWS with the next email [email protected] that kind of email (with a + sign) works like an alias of your main domain. Refer to this article about it: https://www.fastmail.help/hc/en-us/articles/360060591053-Plus-addressing-and-subdomain-addressing
- - Have a Credit Card to set up your account. Don’t worry, because if you don’t use any other resource you won’t be charged by AWS
- - Shut down everything again once you think you won’t be using this VMs anymore
1- Creating a Linux Virtual Machine in AWS
Once you have an account in AWS and you attached your credit card (I guess you don’t need help here, because is really easy to do this 2 steps) we’re ready to start installing our first VM
1.1- In the top search bar look for EC2 instance
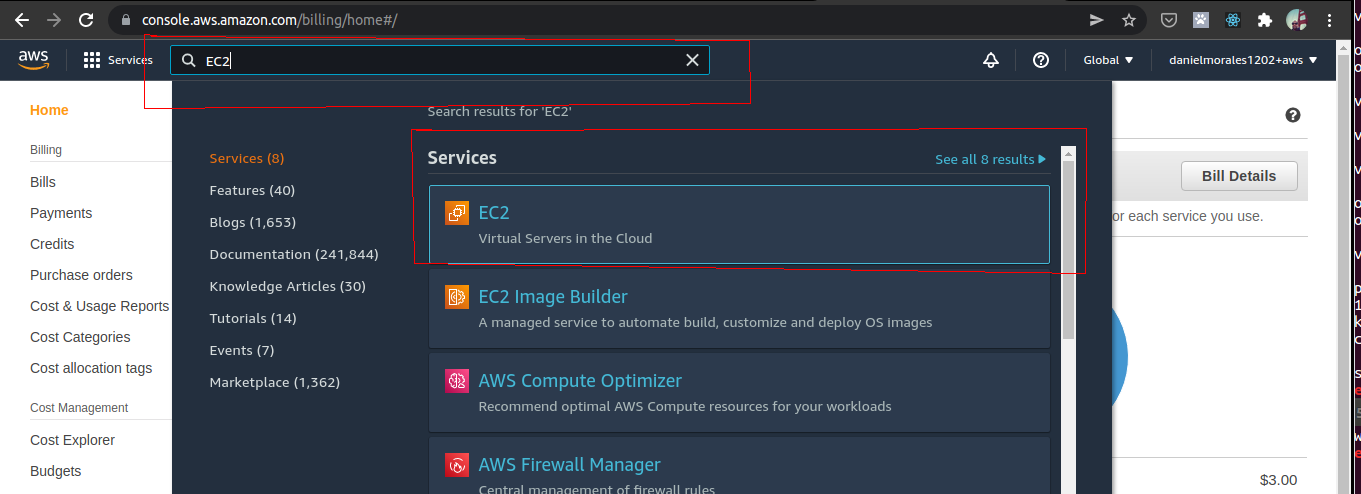
1.2- Click on “Launch Instances” Orange Button

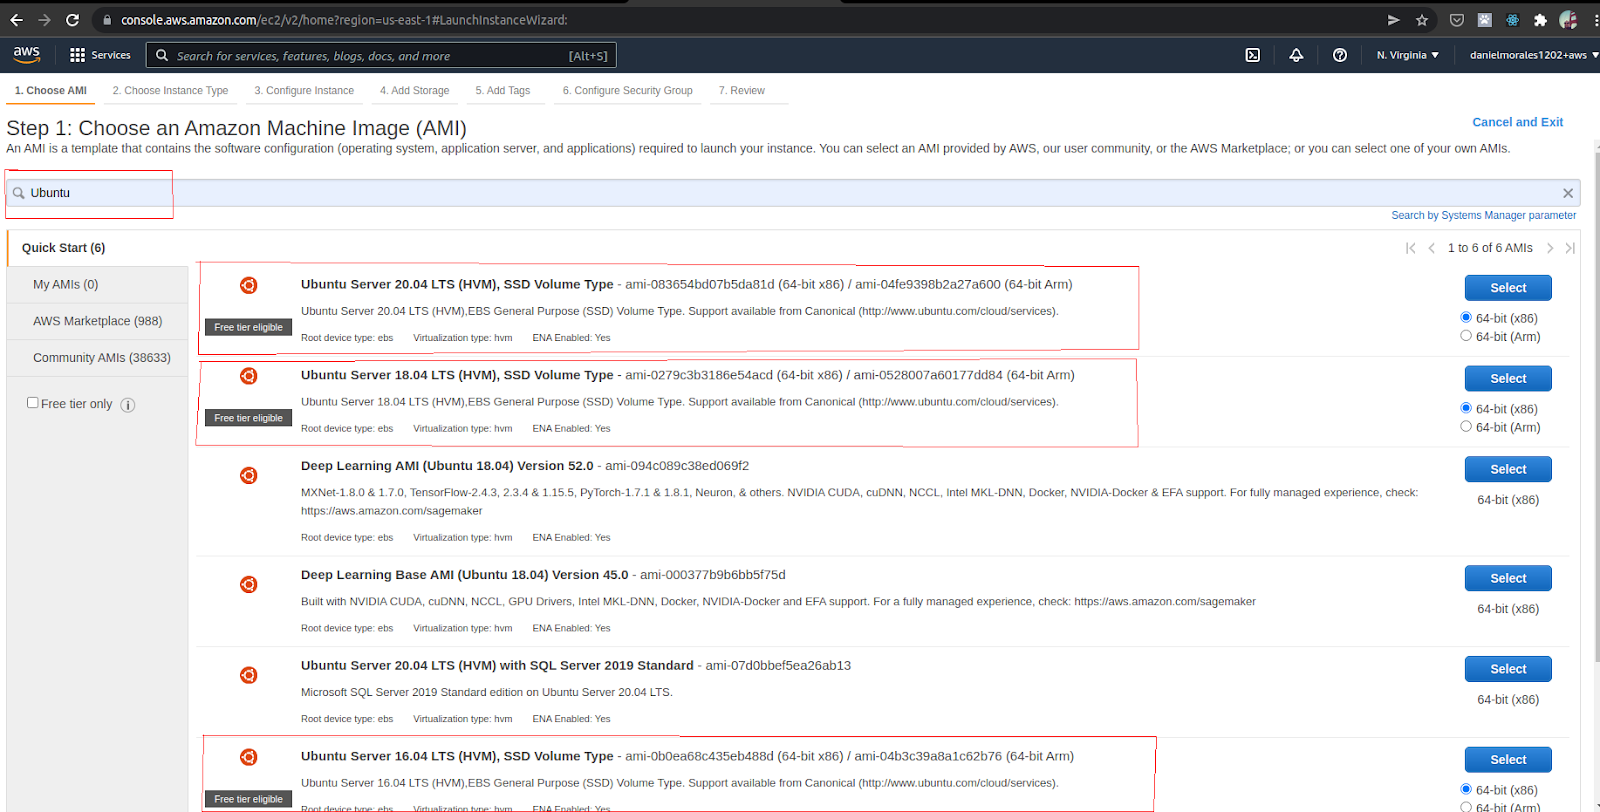
1.3- In the Search Bar write Ubuntu, then hit enter in your keyboard and the different Ubuntu versions will appear. The 3 versions that interest us right now are:
- - Ubuntu Server 20.04
- - Ubuntu Server 18.04
- - Ubuntu Server 16.04
If you see, each one of them has a “Free tier eligible”
Note: Why didn't we choose the Amazon Machine Image (AMI) version? When you come to this page the first time, you saw something like this:
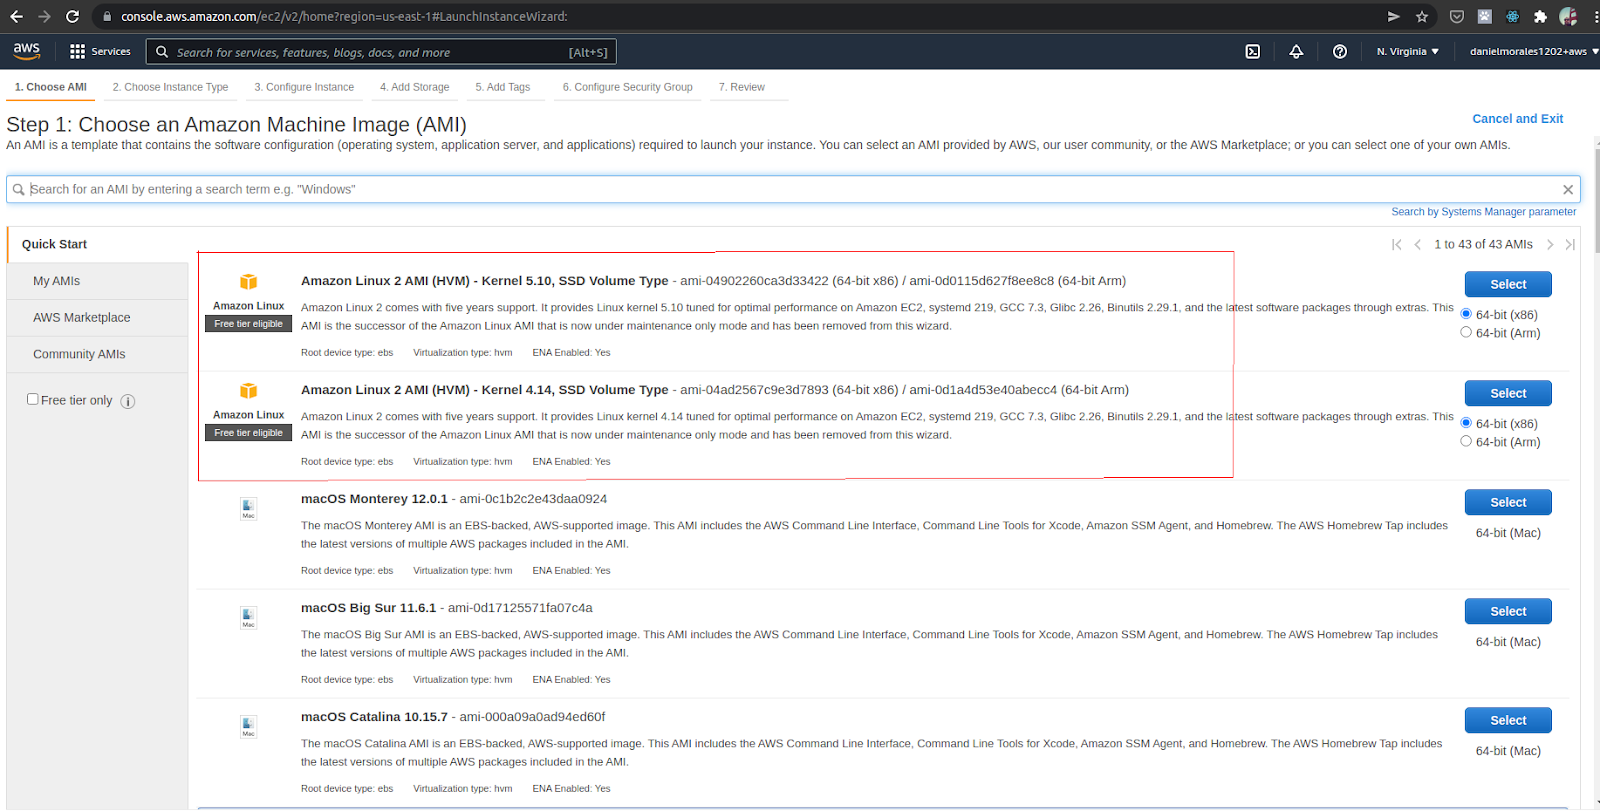
So, what is the difference between Ubuntu and Amazon Linux AMI? There are a few differences, but the major concern now is the commands:
- - With Amazon Linux AMI you’re running a different Linux distribution (Fedora) who need to type yum instead apt-get and some commands are different and quite difficult to find online, because almost everybody uses Ubuntu instead of Fedora. Here you can find some differences: https://www.educba.com/ubuntu-vs-fedora/
- - If you want to know more differences between Amazon Linux AMI instances and Ubuntu instances in AWS, you can find here other post: https://ssiddique.info/amazon-linux-vs-ubuntu-differences.html
With this clear, we’re going to focus on Ubuntu 20.04 (the latest stable version)
1.4- Choose Instance Type: the type we’re going to choose is t2.micro, with the “Free tier eligible”. Then click on Next

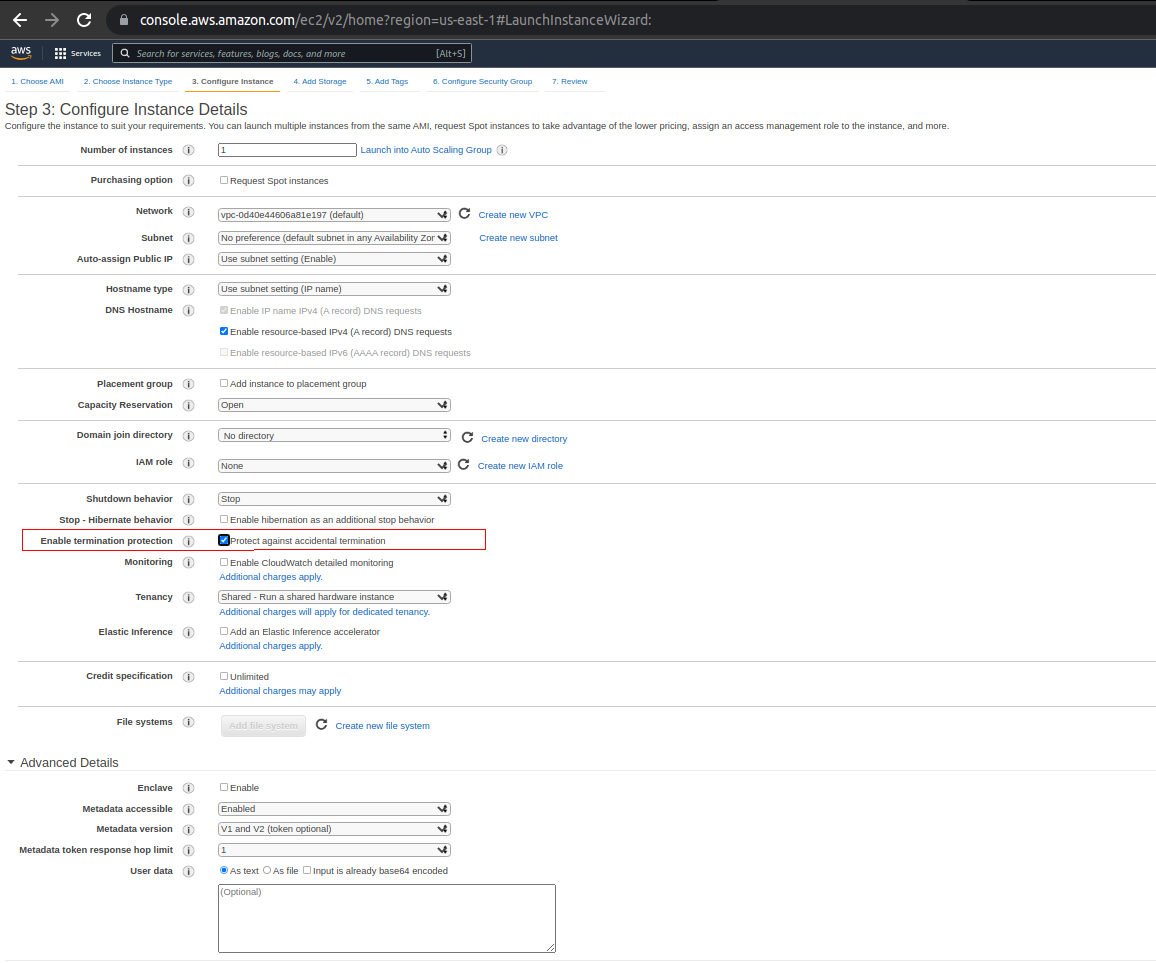
1.5- Configure Instance Details: at this point you should have all this requirements ready, because AWS create everything from us with a default setup, so we don’t need to worry about:
- - Network
- - Subnet
- - Auto-assign Public IP
- - Hostname and others.
The only thing you have to select is: Protect against accidental termination

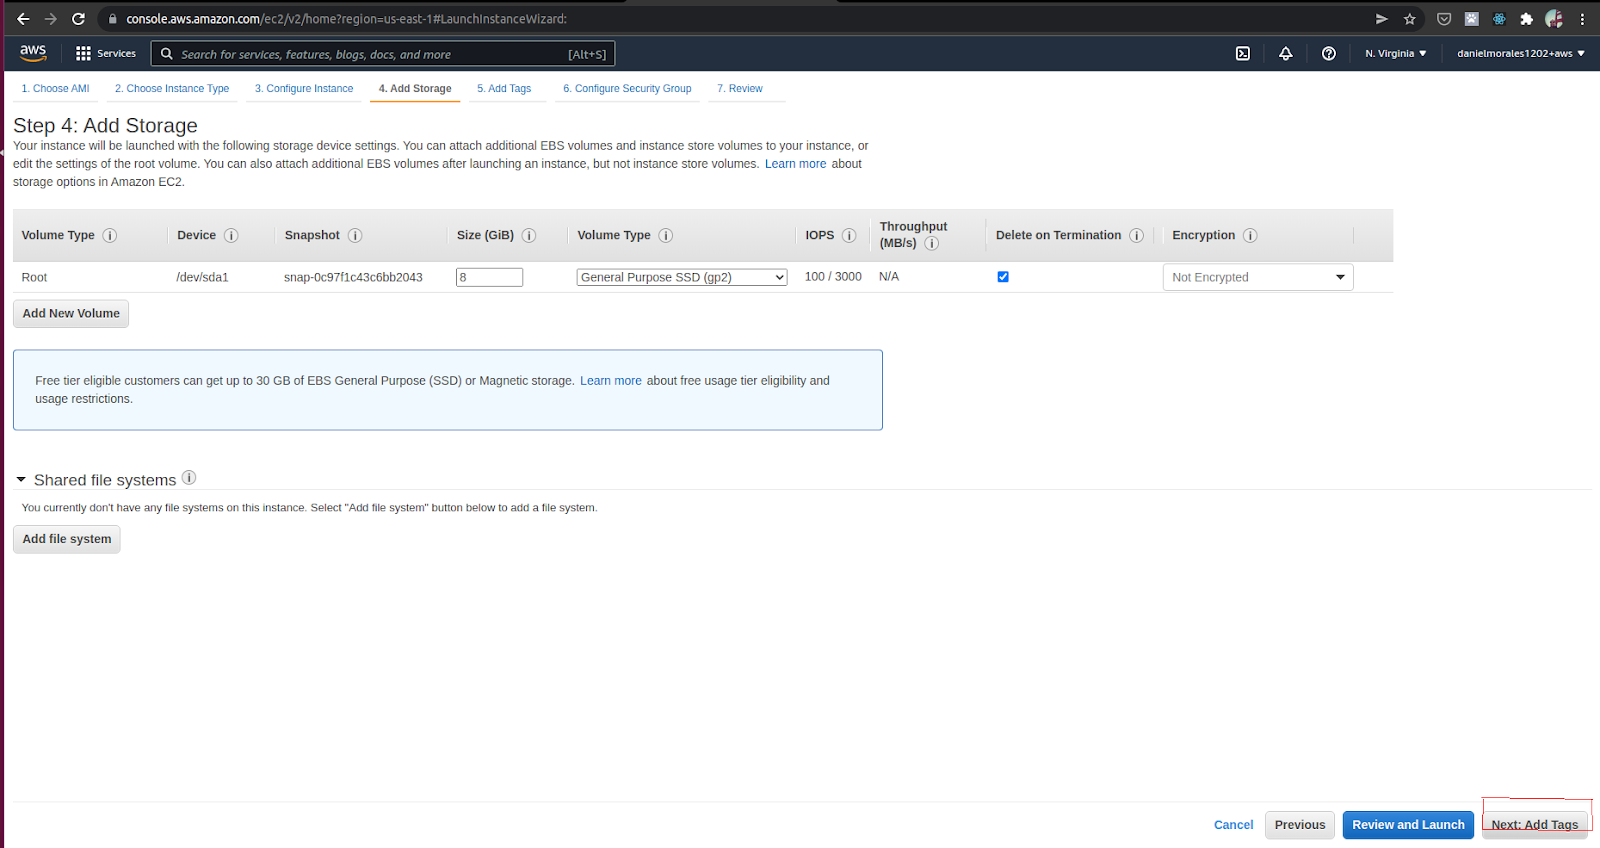
1.6- Add Storage: keep this as default with the same data and click Next: Add Tags
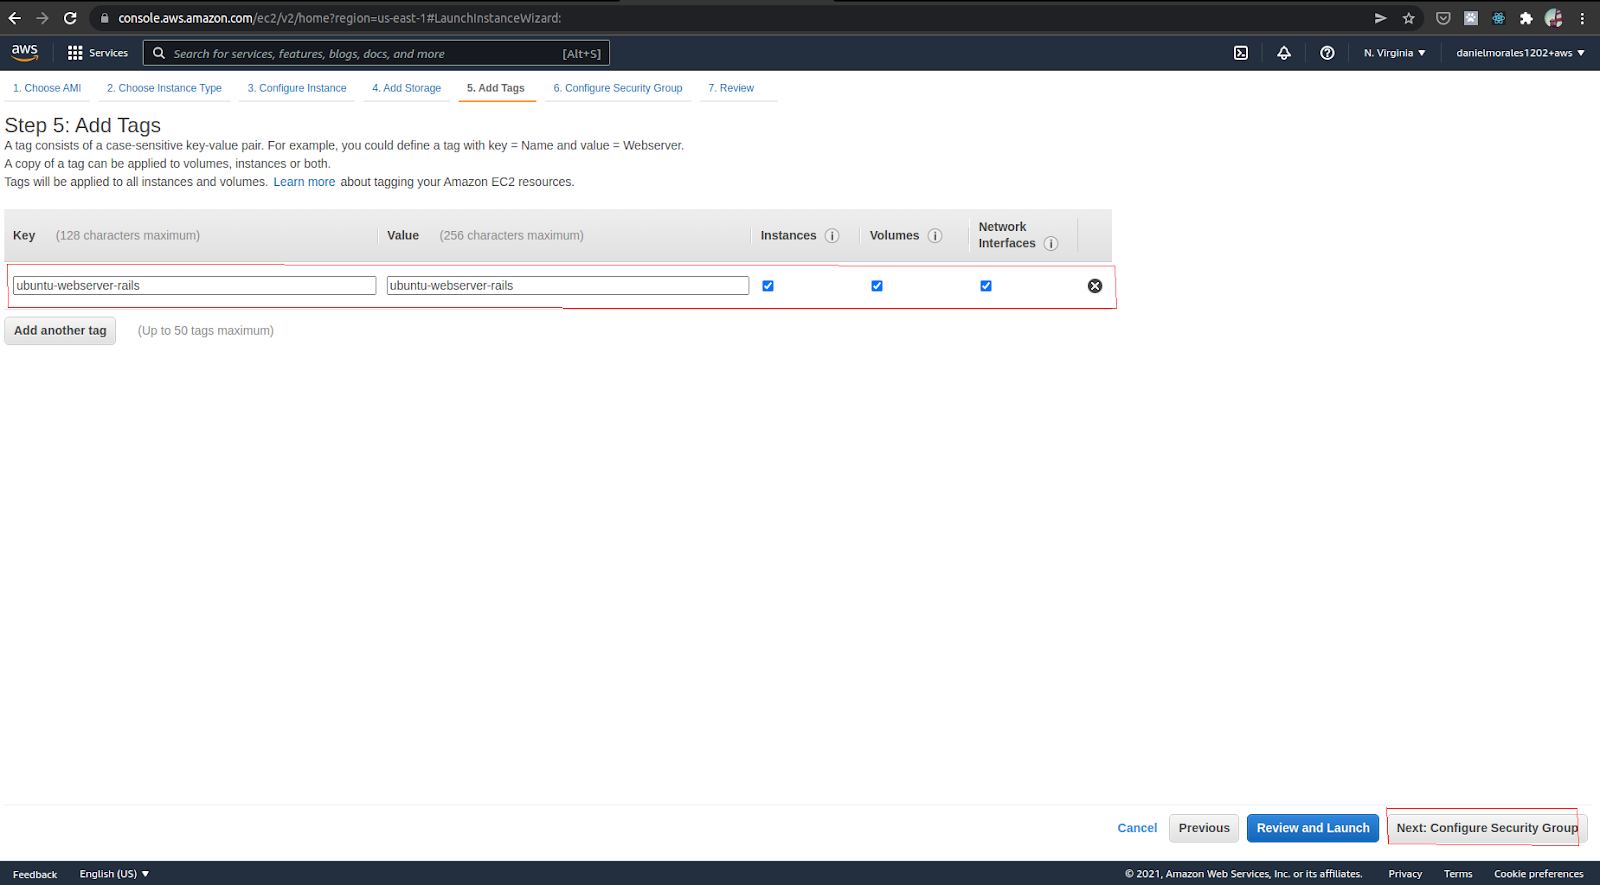
1.7- Add Tags: This step is optional, but can can tag the instance to be recognized easily among others we’ll be creating
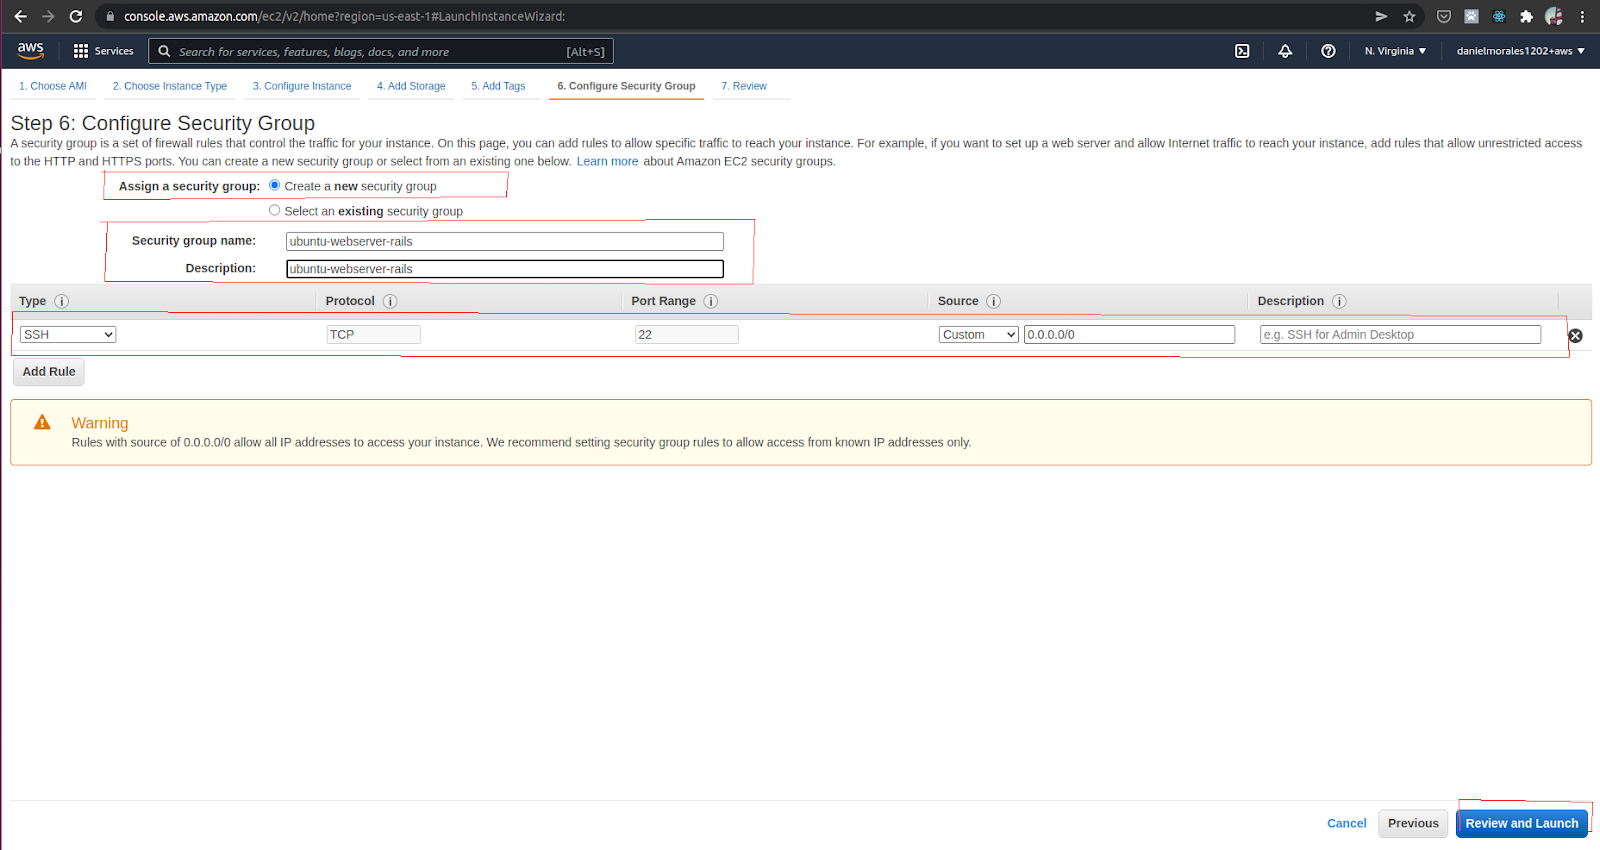
1.8- Configure Security Group: Let’s create a name for this security group and “create a new security group” and give only SSH access for now.
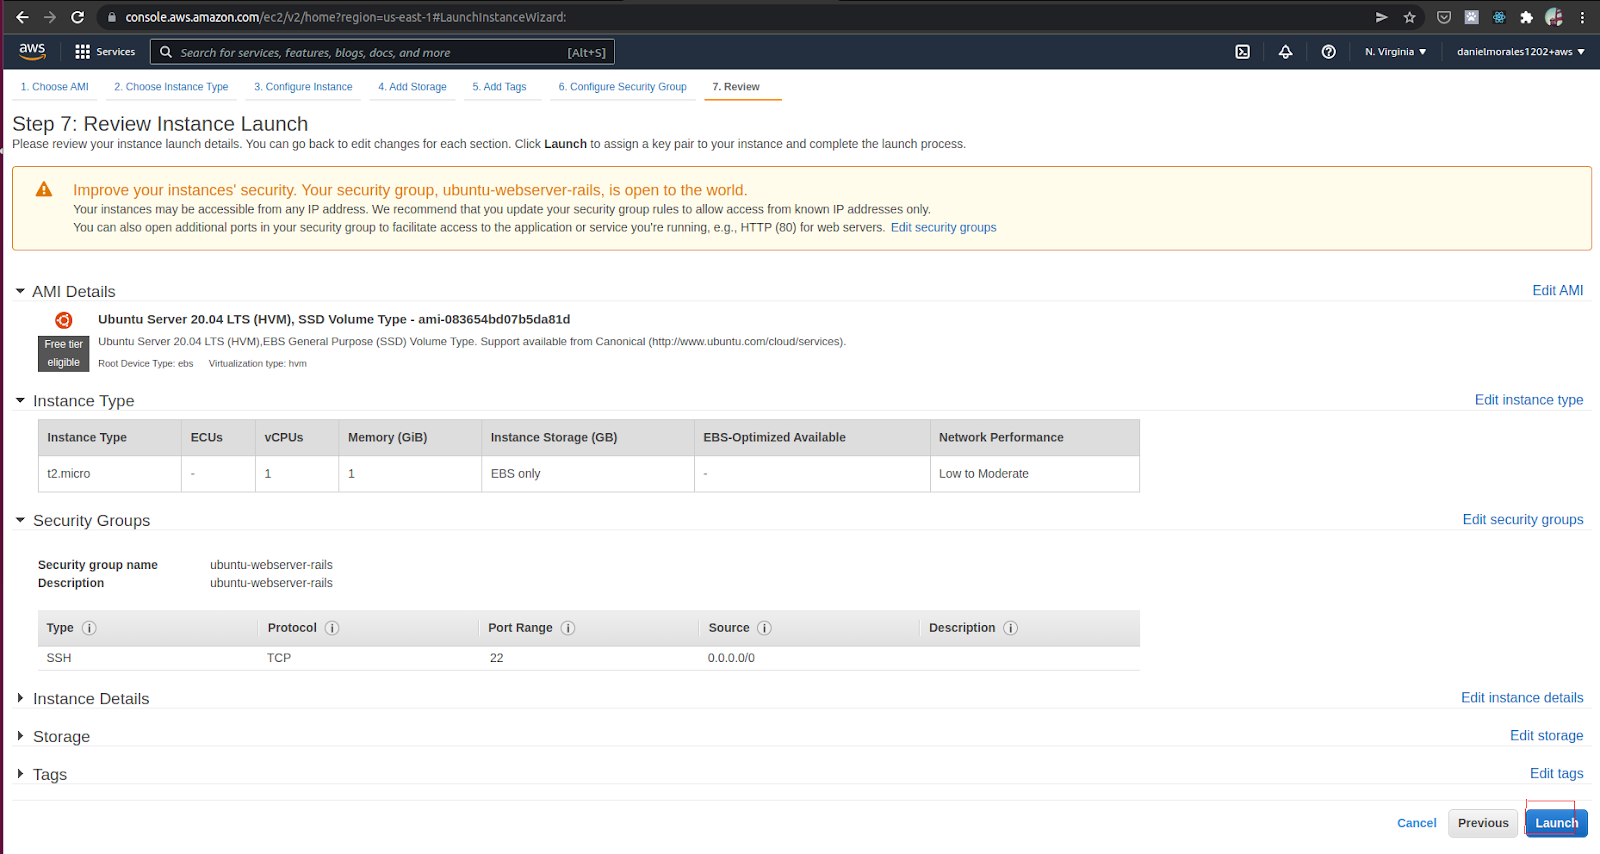
1.9- Review and Launch and click Launch
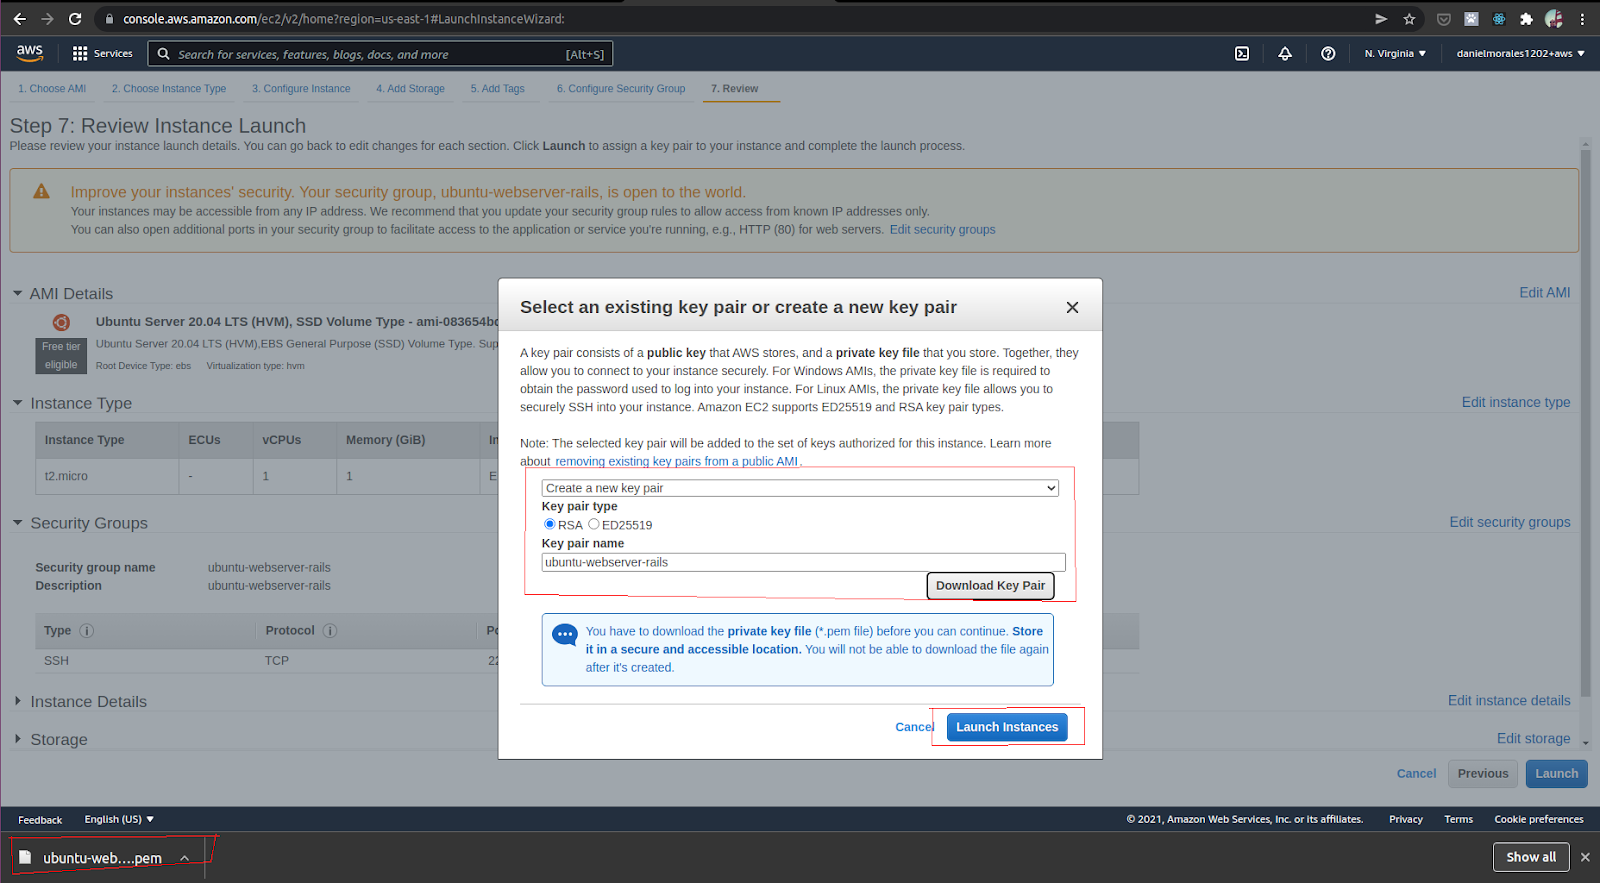
1.10- Select an existing key pair or create a new key pair: this is the most important steps, so please take care:
- At this moment we don’t have any other resources inside AWS, so we need to choose “Create a new key pair”
- - Give a name to the key-pair
- - Click on Download “Key Pair button”
- - You should see your Key Pair downloaded
- - Click on “Launch Instances” button
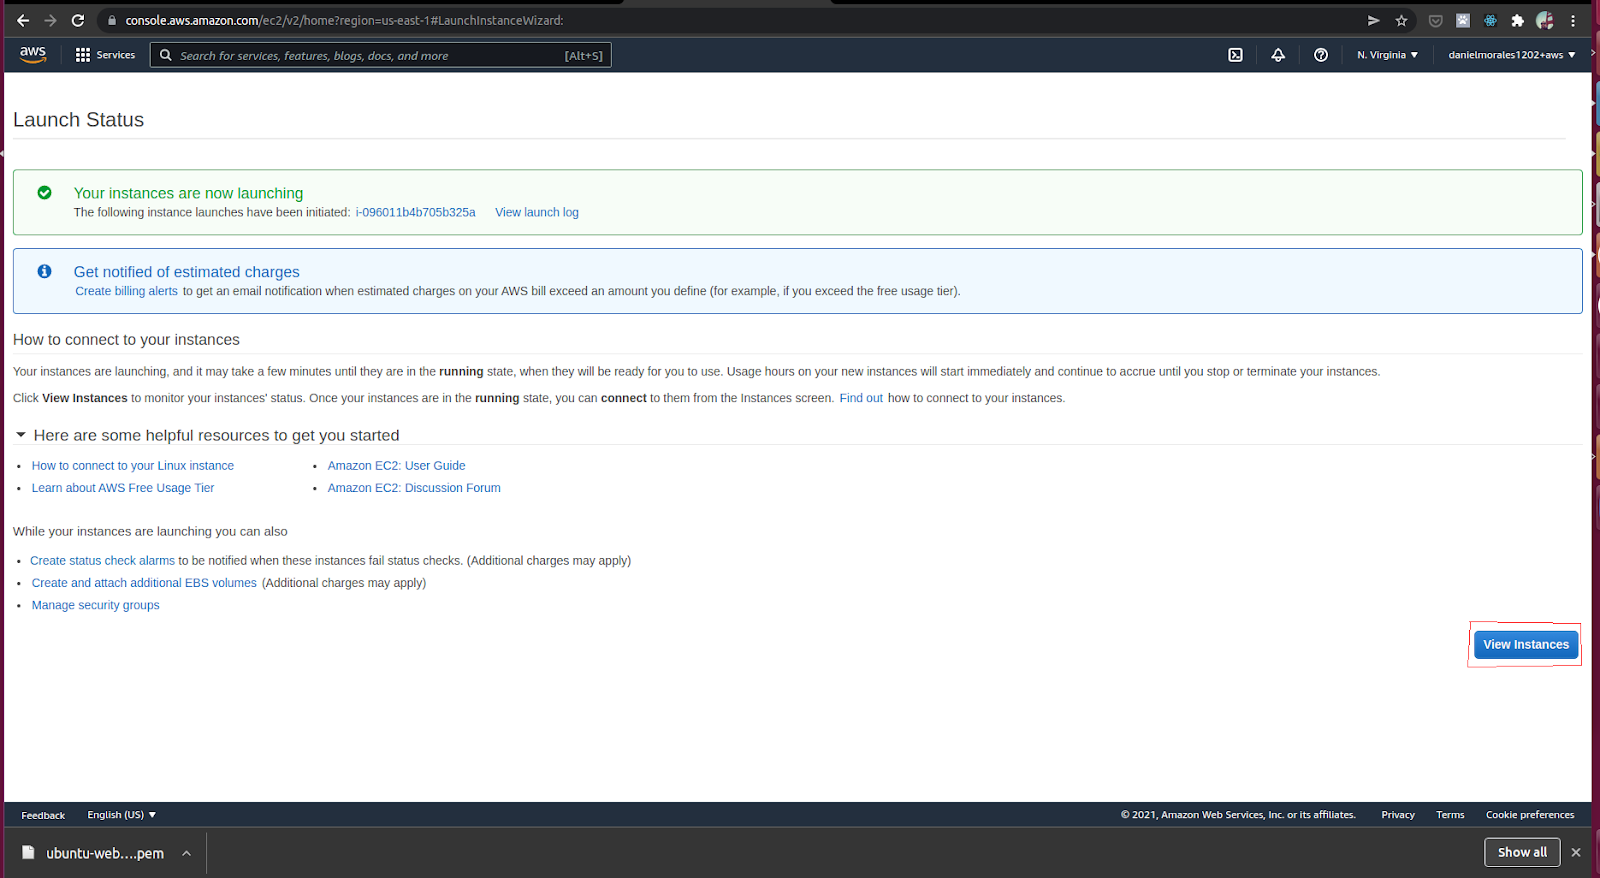
1.11- Instance running

1.12- Assigning an Elastic IP: the next thing we need to do is to allocate an ElasticIP. Actually I don’t know why AWS named it like that, because actually what you're doing is the contrary: creating a static IP. What does this mean?
Currently you have a Public IP Assigned. In my case the number 54.161.148.62

If we reboot or terminate the instance for some particular reason, or the instance is restarted, AWS will assign another available IP address, and this can be a potential issue, because when the IP changes almost any setup related to IPs needs to change. That’s a headache we don’t want to take care of. For that reason we need a “Static IP” where if the instance is rebooted we’ll have the exact same IP as before. So let's do that
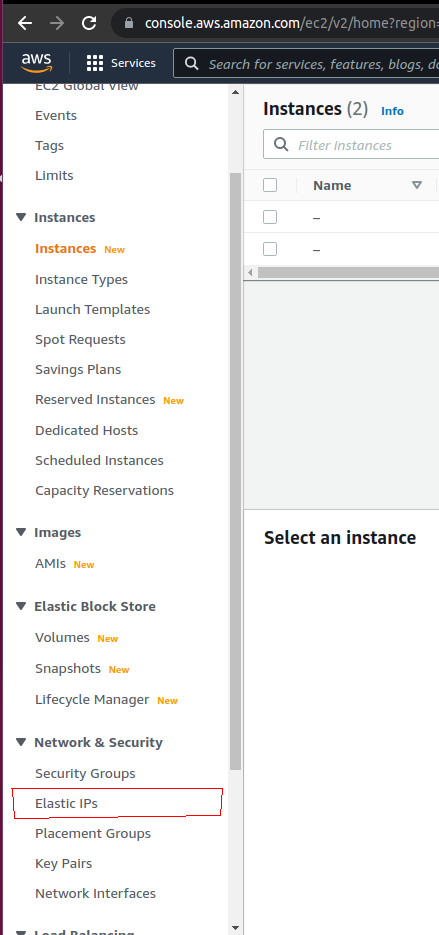
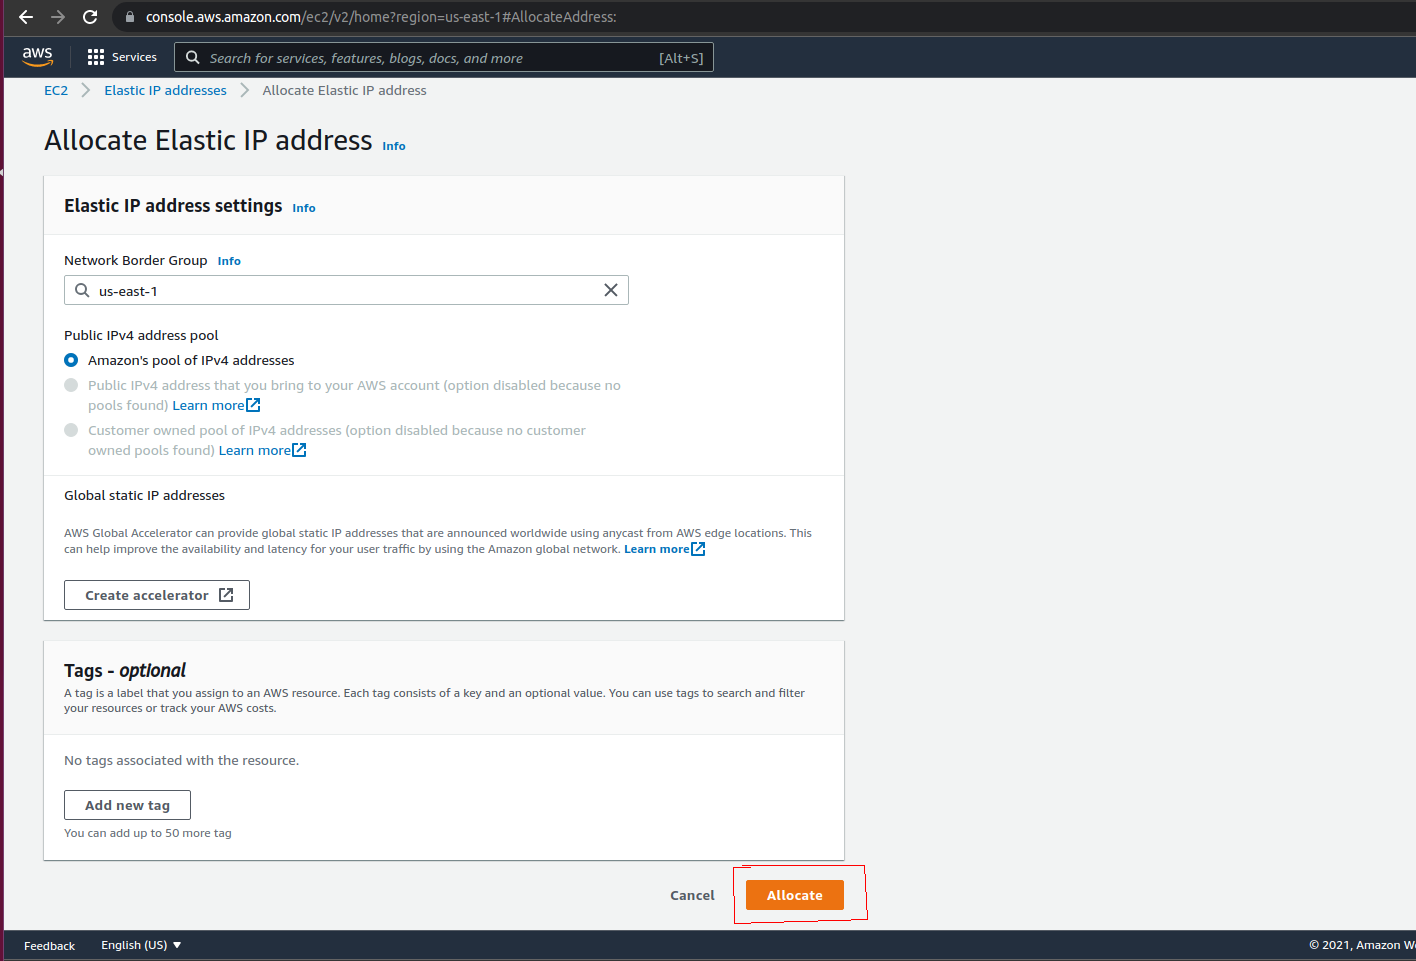
In the left pane choose Elastic IPs and then Click in “Allocate Elastic IP address” orange button

Keep everything the same as default and then click on Allocate button
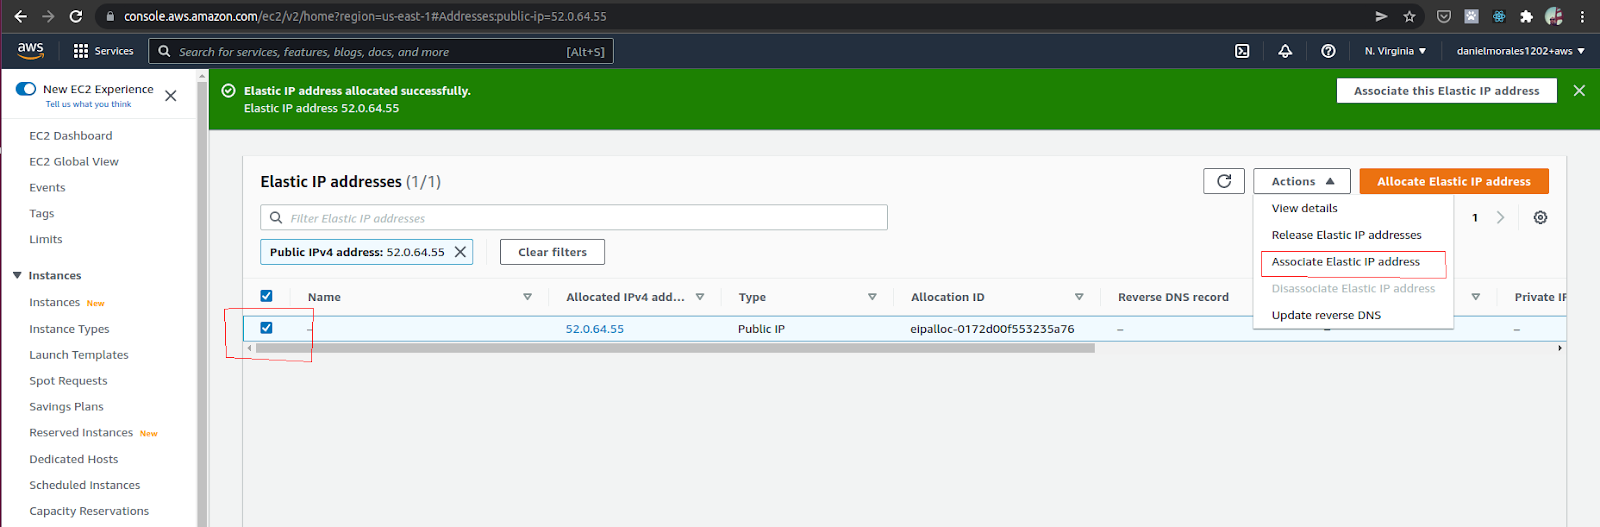
Select the IP Address and in the top right menu in “Actions” choose “Allocate Elastic IP Address”
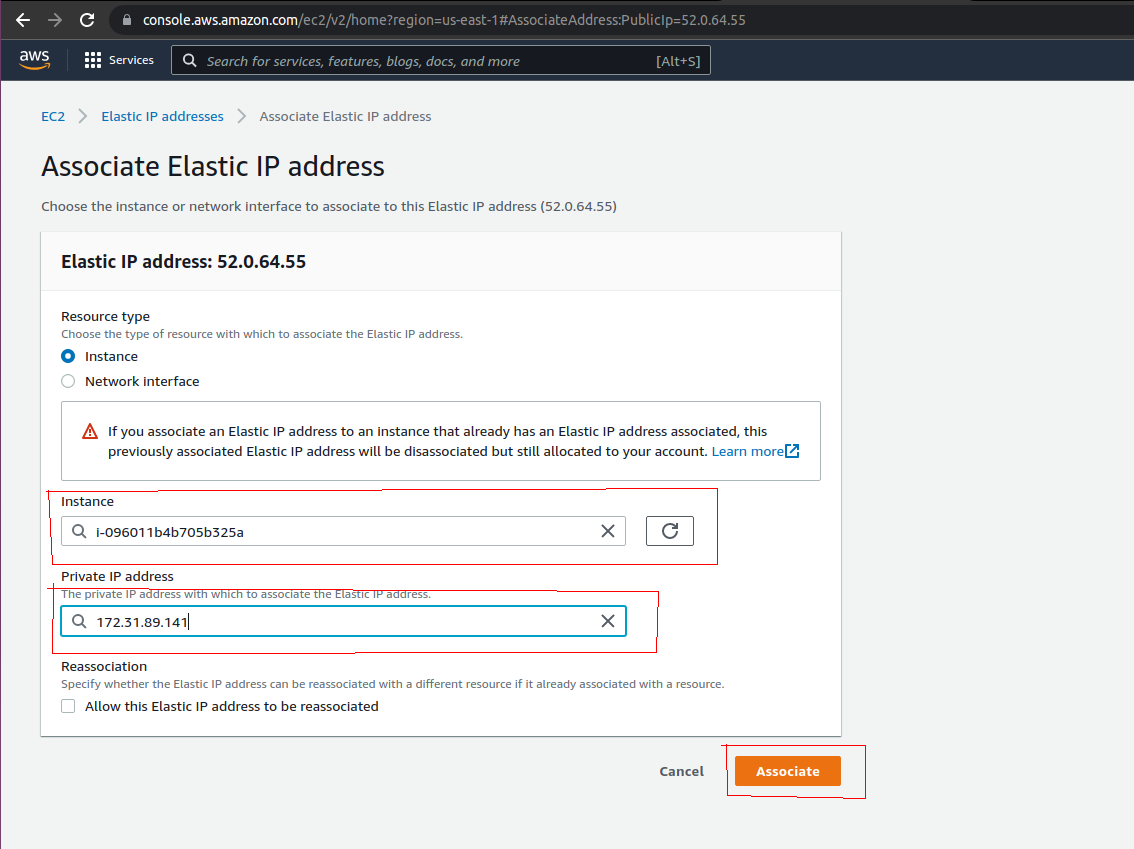
Here you need to choose the “Instance” and the “Private IP Address”. This is relatively easy to do because once you select each box, AWS will show you the instances and Private IP addresses available. Just choose the right one and the click on “Associate”
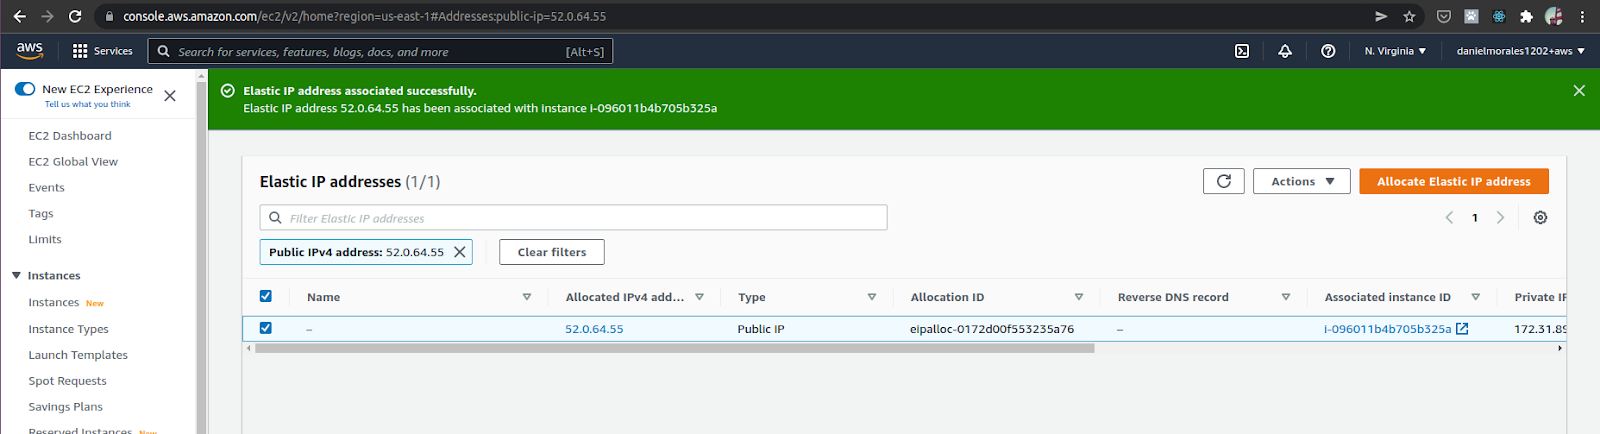
You can see now the confirmation
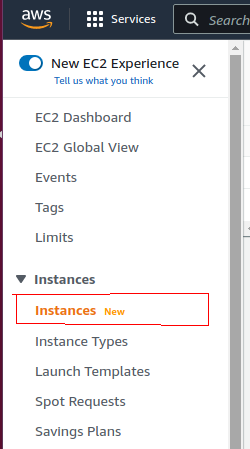
Now go to the instances again in the left pane
And refresh the page… you’ll see now the new Elastic IP associated

1.13- Adding SSH Key Pair to your machine
This is a critical step to access the instance from your local machine. In step 1.10 we downloaded the Key Pair in a .pem format.
I don’t know which Operating systems you’re using in your computer, I’m running Linux locally, so the steps I followed are these
So, let’s go to our local terminal and type the next commands
➜ ~ cd Downloads
➜ Downloads mv ubuntu-webserver-rails.pem ~/.ssh/
➜ Downloads ~/.ssh/
➜ .ssh chmod 400 ubuntu-webserver-rails.pem
➜ .ssh cd
➜ ~ ssh -p 22 -i ~/.ssh/ubuntu-webserver-rails.pem [email protected]

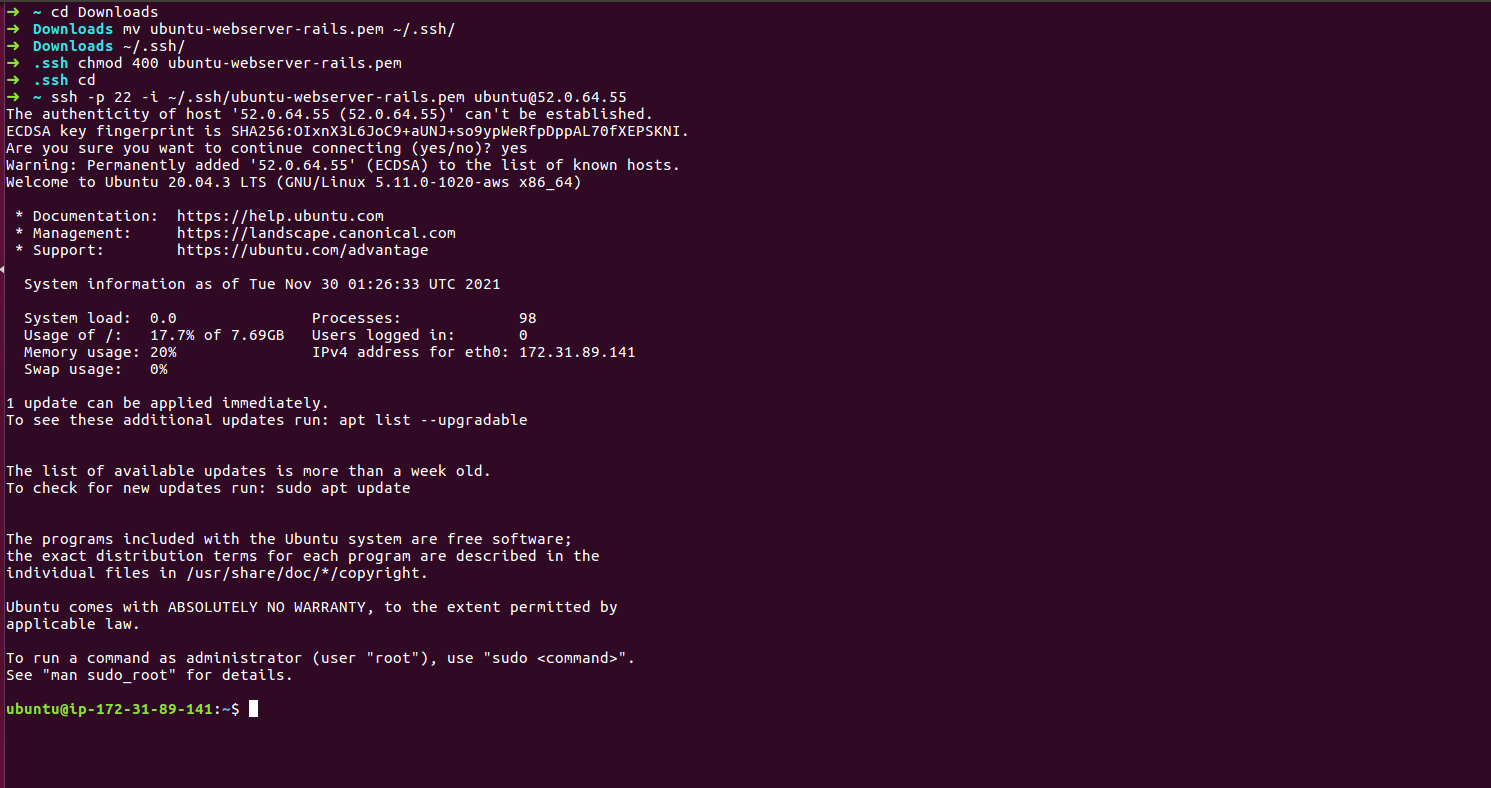
With this we’re inside our AWS instance running Linux 20.04 and ready to create whatever we want inside it